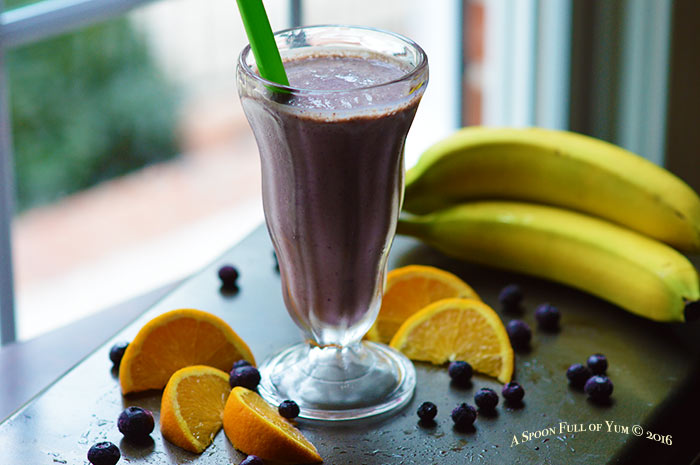
Off and on this winter we have had glimpses of spring with just enough of a warm-weather teaser to make me long for sunny days. In this season while citrus fruit is still abundant, take advantage of the chance to use whole oranges to make this smoothie — it’s like a dose of liquid sunshine! Whirl oranges, blueberries, bananas, and kefir (or yogurt) into a real super-food smoothie rich in fiber, phytonutrients, and probiotics.
The good news: your whole family can enjoy this frosty treat without breaking the bank!
After my trusty Kitchen Aid blender had served us for about 7 or so years, the pitcher finally cracked and I couldn’t find a replacement. After a few weeks of making smoothies with an immersion blender, we determined that it was time to buy a new blender. I was all set to buy another Kitchen Aid, but my Farmer had other ideas… he surprised me with a Mother’s Day gift that went down in the history annals of our farm– A Vitamix blender!
My Farmer, by the way, never buys anything without researching it for a few weeks… or months! He is very careful to purchase only the best equipment for the best price, whether it is a torque wrench or a blender. He has taught me the value of purchasing quality items that will last instead of just snatching up the cheapest deal to “make do”. His theory is that if you purchase high quality items on the front end you are much less likely to have to replace them later on, and you are also able to work more efficiently as a result. Imagine that! It is such a common sense approach, but one that was by no means native to my thinking prior to marriage. The Vitamix that he purchased was actually a refurbished one (like the one in the link at the bottom of this post) at a much more reasonable cost that a new model, but it comes with a five-year warranty. I have been so pleased with the texture of my smoothies since the advent of our Vitamix. I can even throw whole pineapple cores or baby carrots in with my other ingredients and the mixture turns out just as smooth as one could imagine.

Making whole-orange juice
Orange juice lends such a nice flavor to smoothies, but I don’t typically buy orange juice at the store. Instead, I prefer to squeeze my own oranges to ensure that we benefit from the entire array of nutrients contained within that bright sphere! Rather than having to go to all the work of squeezing the orange juice before adding it to my smoothie, I blend the entire orange, minus the peel and membrane, into the smoothie. (That pulpy, fibrous material usually removed by juicing is so good for you!) A Vitamix blender works well for making this whole-orange juice, but I was successful using my immersion blender tonight when I wanted orange juice to add to some gingered orange-pear muffins that I was making. Just slice off the outer layer of the orange (all of the white membrane) and throw the entire orange into the blender pitcher along with the other smoothie ingredients. Give it a whirl and in just a few seconds you have fresh orange juice ready to use in your recipes!
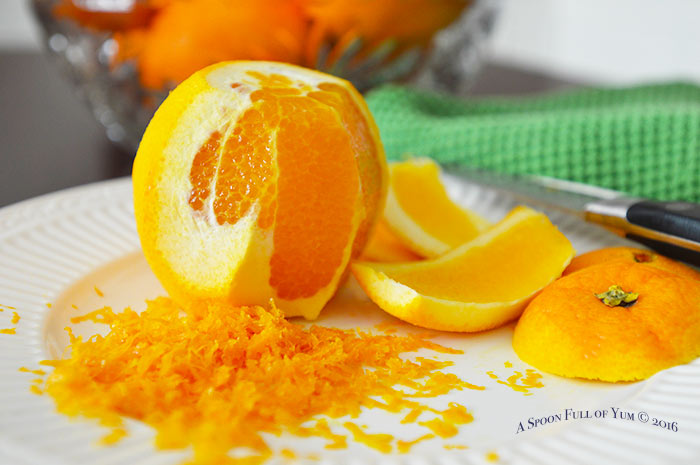
Nutrition Bite: Oranges, renowned for their high content of vitamin C, also contain a potent matrix of other phytonutrients (aka plant-based nutrients) which are particularly concentrated in the orange’s peel and white inner membrane. These phytonutrients work in cooperation with vitamin C to help protect the DNA of your cells from the harmful effects of free-radical oxidation, which can lead to inflammatory conditions, cancer, and arterial plaque. Bottom line: get your vitamin C from whole fruits, not from a bottle!

Zest of flavor
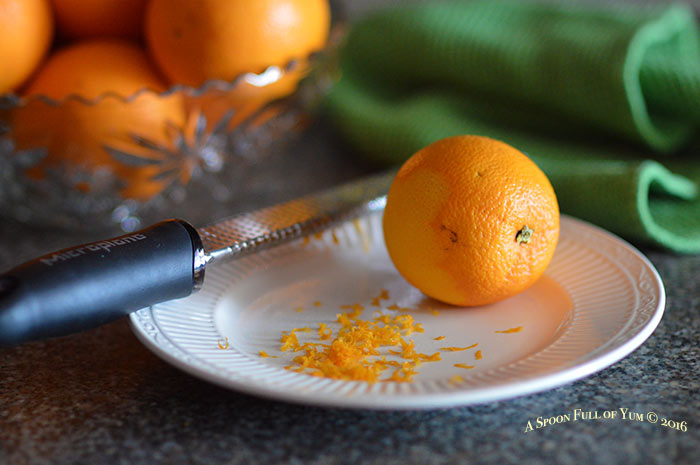
Wait! Before you peel those oranges, take a second to harvest the fragrant zest (thin orange outer layer). I use a Microplane zester (another of my Farmer’s gifts to me) to make short work of this task. My Farmer tells me that the company who manufactures these Microplane tools first started as a producer of woodworking tools, so the design is very efficient. The Microplane is also useful for shredding wispy bits of parmesan cheese or for grating nutmeg.
Store your citrus zest in a small glass jar in the freezer and it will be ready at a moment’s notice to add a burst of fresh flavor to baked goods, or even main dishes of chicken or pork.
Wash your produce!
Even if you purchase organic produce, make sure you wash your produce well under running water. Especially if I am planning to eat the peel, I like to spray my produce with a mixture of distilled vinegar and water (3 parts water to 1 part vinegar) for a natural produce spray that is incredibly cheaper than the spray you find in the produce section! I spray this vinegar solution onto my produce, allow it to sit for a few minutes, and then rinse under running water. I sometimes use my citrus-infused vinegar as an extra measure of cleaning power.

What is kefir?
Milk Kefir can be described as a drinkable yogurt, containing up to 50 strains of beneficial bacteria and yeast; however kefir contains many more cultures than does yogurt. Milk Kefir, unlike yogurt, can actually repopulate your gut bacteria and help to heal your gastrointestinal tract! A healthy gastrointestinal tract is the gateway to improved overall health because your gastrointestinal system is your first line of immune defense.
This creamy, slightly fizzy drink is excellent whirled into smoothies or enjoyed with a splash of maple syrup or fruit juice! Milk kefir is now available at many grocery stores in the yogurt section (commonly under the Lifeway brand). You can actually make your own kefir using milk kefir grains and dairy milk (which provides the lactose for the grains to consume), and in only minutes a day you can create a supercharged probiotic drink for a fraction of the price you pay in a grocery store! (Homemade kefir contains many more probiotic strains than does commercially produced kefir.) Because I pay only for the whole milk I use to culture the kefir, homemade kefir is a significant cost savings for my family compared to buying yogurt or store-bought kefir, and certainly compared to purchasing commercially produced probiotics or probiotic drinks!
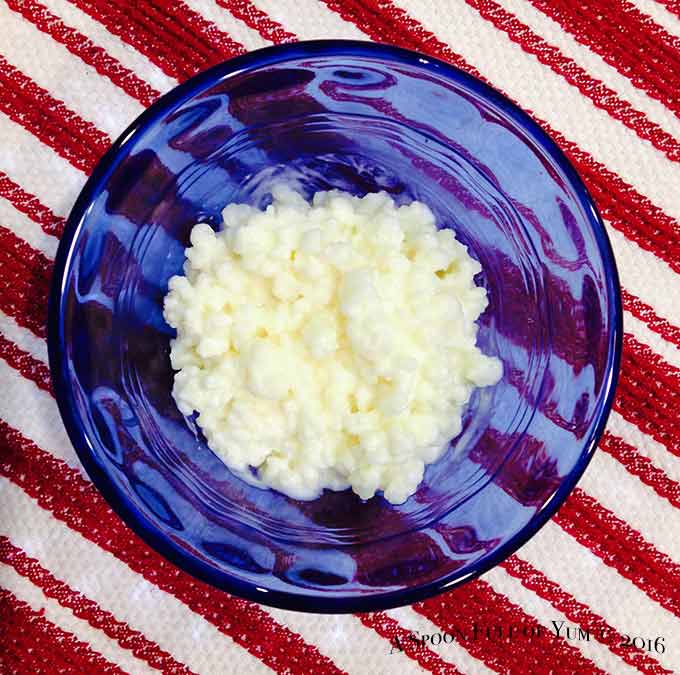
There is also another type of kefir called water kefir that I also culture at home and it does not require dairy milk to culture. (Instead, it uses a type of sucrose- based sugar as a food source instead of lactose, the sugar in milk). Water kefir tastes significantly different from milk kefir and is a good option if you are allergic to dairy or would prefer more of a clear, juice based-drink.
Usually people obtain milk kefir grains from a friend or someone in their area. (Contrary to what my little Farmer thought once, they don’t just appear if you leave out your milk on the counter for a few days!) If you live in the Nashville area, let me know if you are interested in some milk kefir grains (or water kefir grains).
Stay tuned! There is so much that I want to tell you about kefir that I have actually started preparations for another post in which I will provide more details about the preparation, benefits, and uses of kefir.
Have it your way
Jazz up your smoothie with a few power-packed additions. Start by adding with 2-4 tablespoons at at time of one of these along with your other smoothie ingredients:
- Chia seeds
- Flax seeds
- Flaked Coconut
- Pumpkin seeds (unsalted(
- Sunflower seeds (unsalted)
- Oatmeal
- Walnuts
- Almonds
- Raw cashews
A high-powered blender will make short work of incorporating these, but it will take longer to achieve a smooth texture with a standard blender.
Serving Suggestion

Here are the smoothie “samplers” that my Little Farmers enjoy. These small vintage glasses (a gift from a dear cousin) are just the perfect size for their little hands. (Truthfully, I adore these little glasses for my own smoothies as well — I just have to keep refilling them!) This view is from my breakfast room window (and the fingerprint smudges are compliments of the Little Farmers! Ahhhh! Time for some “Spring Cleaning!”)
- 2 naval oranges, peeled
- 2 cups frozen blueberries
- 3 medium to large bananas
- 3 cups unsweetened milk kefir or yogurt
- Add all ingredients to blender jar. Blend at hight speed for 20-30 seconds or until well combined. Serve immediately.

Sounds delicious! 🙂